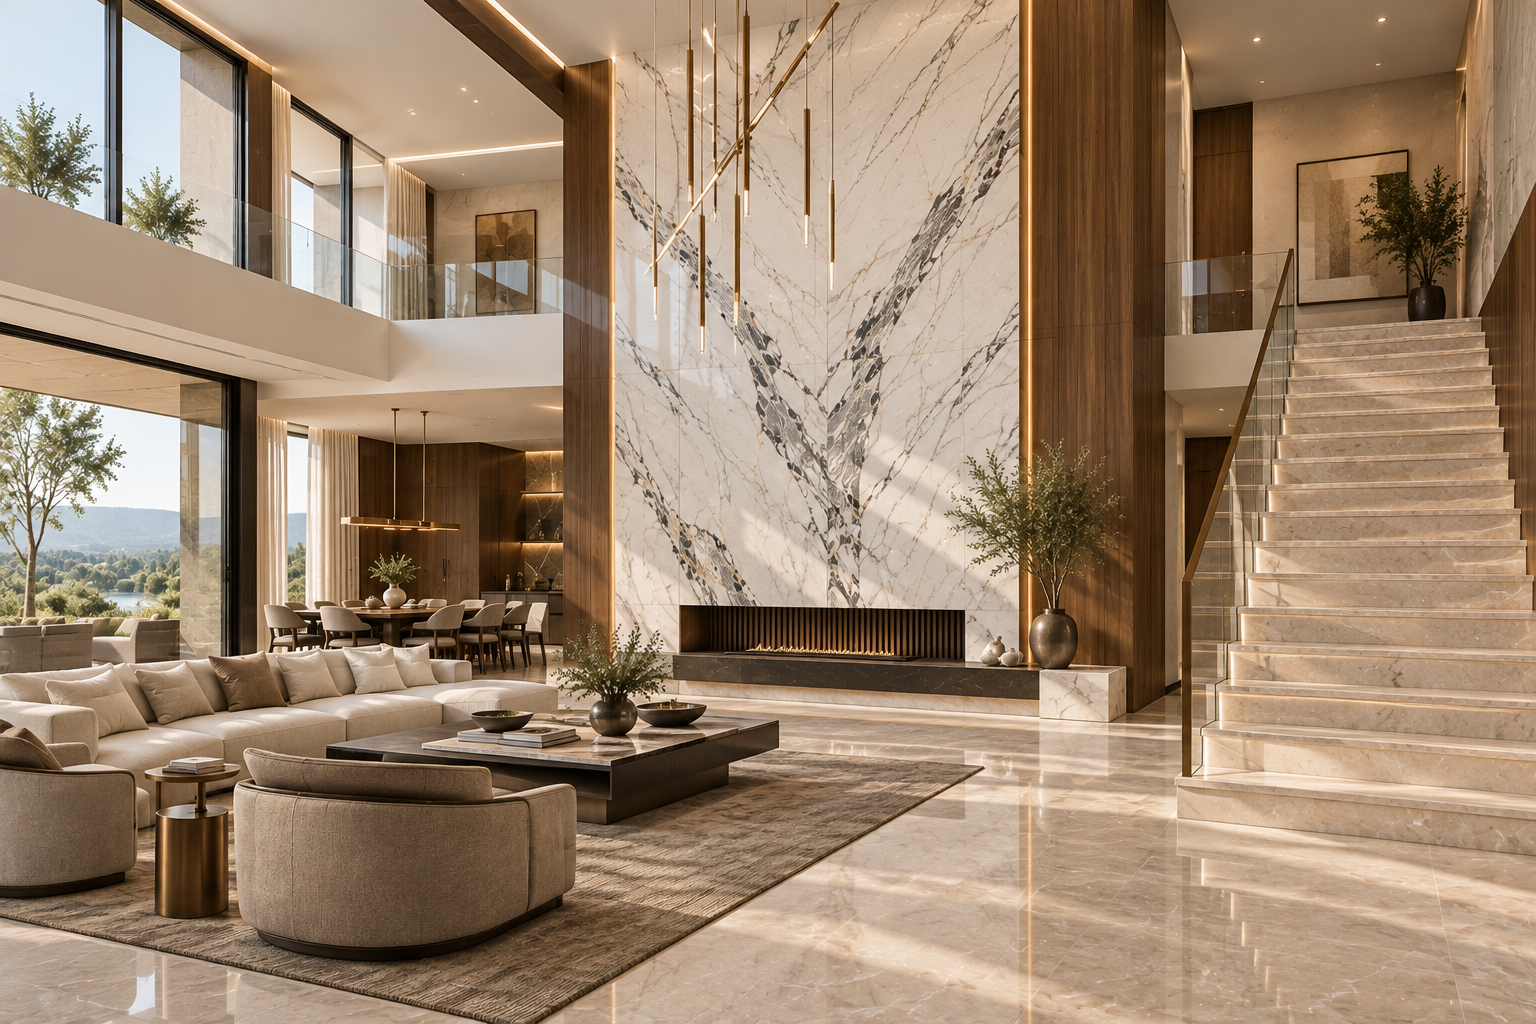
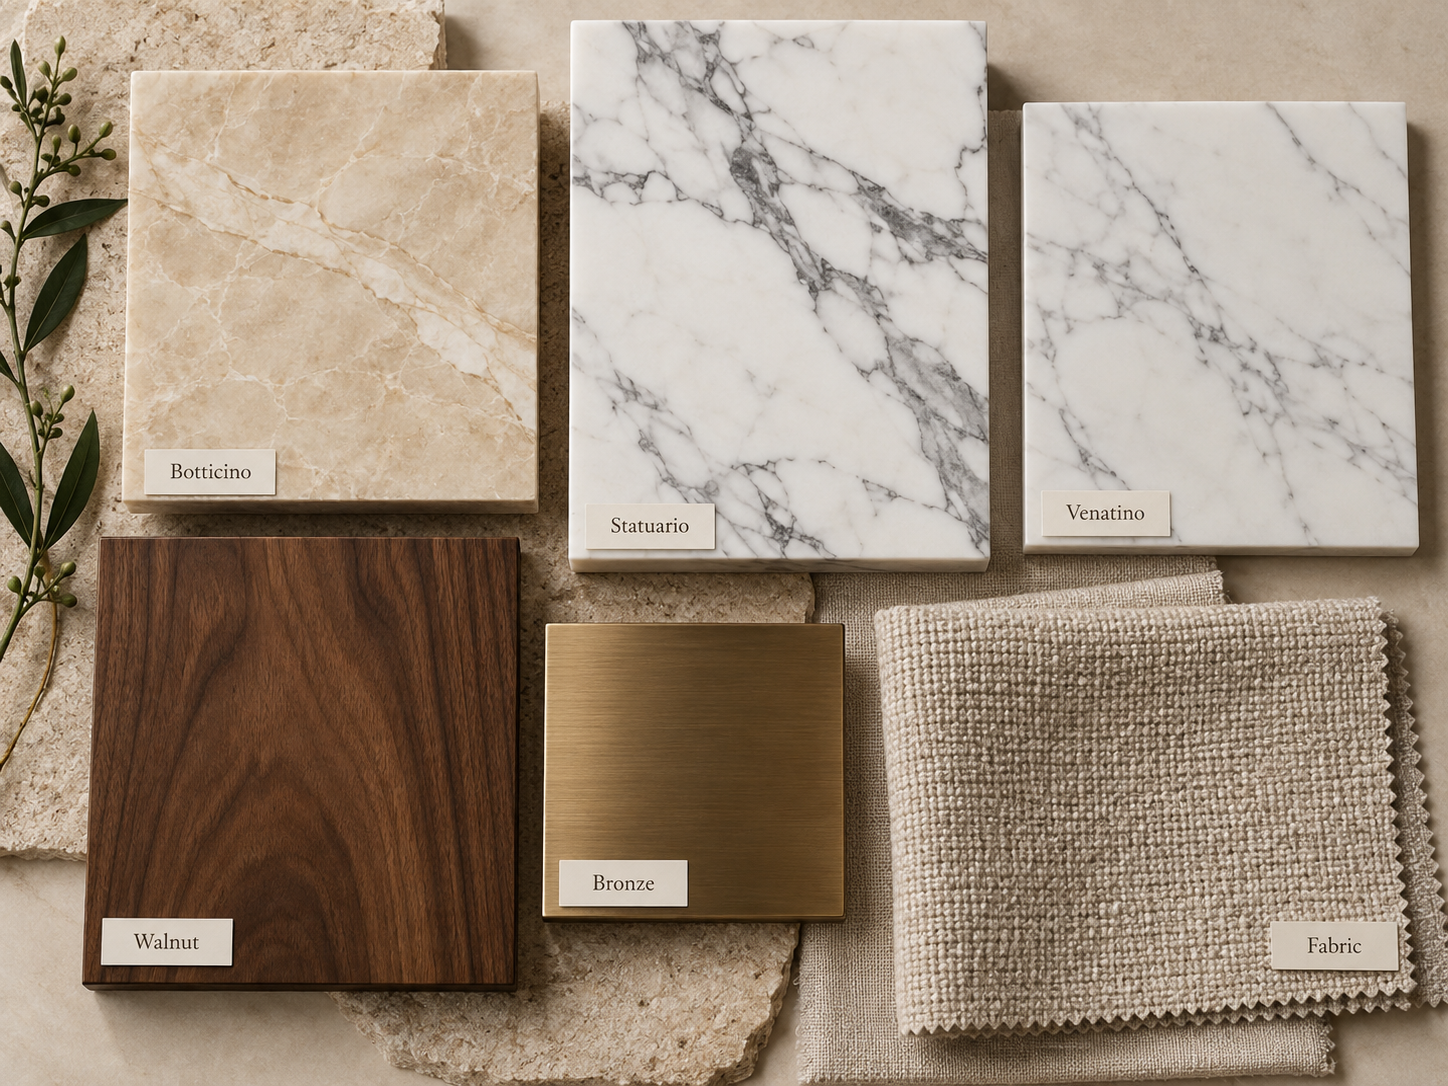
Quick answer: Give every marble a clear role. Use a foundation stone for connected floors and passages, a statement stone for selected walls or double-height spaces, and a quieter secondary stone for private rooms or bathrooms. A considered combination—such as Botticino for continuity, Statuario for a focal wall and Venatino in a quieter room—often feels more complete than choosing a different stone for every space.
Begin with the whole plan
The best villa does not need the most marble. It needs a clear material hierarchy.
A villa is a connected sequence, not a set of unrelated rooms. The entrance opens toward the living area; the staircase links floors; sightlines carry a feature wall into adjoining spaces; private rooms and bathrooms need a different level of quiet. Start by deciding where the stone should create continuity and where it should create emphasis.
| Material role | What it does | Where it can work | Example direction |
|---|---|---|---|
| Foundation | Connects the largest visual areas | Main floor, passages, connected living spaces, stairs | Botticino or restrained warm marble |
| Secondary | Gives selected rooms a quieter identity | Bedrooms, dressing areas, bathrooms, vanities | Venatino, Vietnam White, calm beige |
| Statement | Creates a focal moment | Double-height wall, entrance, powder room, table | Statuario / Satvario, Brescia Aurora, expressive slab |
These are roles, not fixed product assignments. Compare actual slabs, undertones, lot variation and available dimensions before confirming a scheme.
Step one · Map the zones
Sort the villa into four design conditions.
01 · Public spaces
Entrance, foyer, formal living, dining, double-height areas and principal staircase. These need the clearest continuity because they share sightlines and welcome visitors.
02 · Private spaces
Bedrooms, dressing rooms, family lounge and study. These can be softer, more personal and less visually active.
03 · Wet areas
Bathrooms, powder rooms and vanity zones. They are contained spaces where a distinct stone can work, provided floor safety and maintenance are considered.
04 · Statement areas
Feature walls, fireplaces, bars, selected counters and tables. Reserve expressive slabs for places with enough scale to show the complete composition.
FOUNDATION CONNECTS THE VILLA · SECONDARY STONE SOFTENS PRIVATE ROOMS · STATEMENT MARBLE CREATES A FOCAL POINT
01 — Entrance & foyer.
The entrance establishes the material language of the house. Aim for a confident first view without revealing every design idea at once. Plan the foyer floor with the first view toward the staircase and living room, and check the actual slab layout so the doorway, main axis and any border land cleanly.
- Prioritise broad usable pieces, a compatible shade range and controlled joints.
- Carry the foundation marble into the connected hall where the architecture is open.
- Choose one focal element—a wall, console backdrop or staircase view—rather than making every surface compete.
CALM FLOOR + ONE FOCAL MARBLE + ARCHITECTURAL LIGHT = A STRONG ARRIVAL
A refined Botticino floor can sit beside one expressive wall. A highly patterned floor, bookmatched wall, decorative ceiling, elaborate lighting and patterned furniture all competing at the threshold can feel crowded.
02 — Formal living room.
In a large living room, the floor becomes a major visual field, so consistency matters more than finding one spectacular slab. Compare enough slabs from the proposed lot to understand the range of tone and movement; then review the planned floor area, furniture footprint and adjoining thresholds together.
Prioritise lot compatibility, broad usable dimensions, vein direction, joint rhythm and the room’s natural light. A lively slab may look exceptional on its own but feel restless when repeated across a large uninterrupted floor. Use rugs and furniture to create softer islands without breaking the stone plane.
03 — Double-height living area.
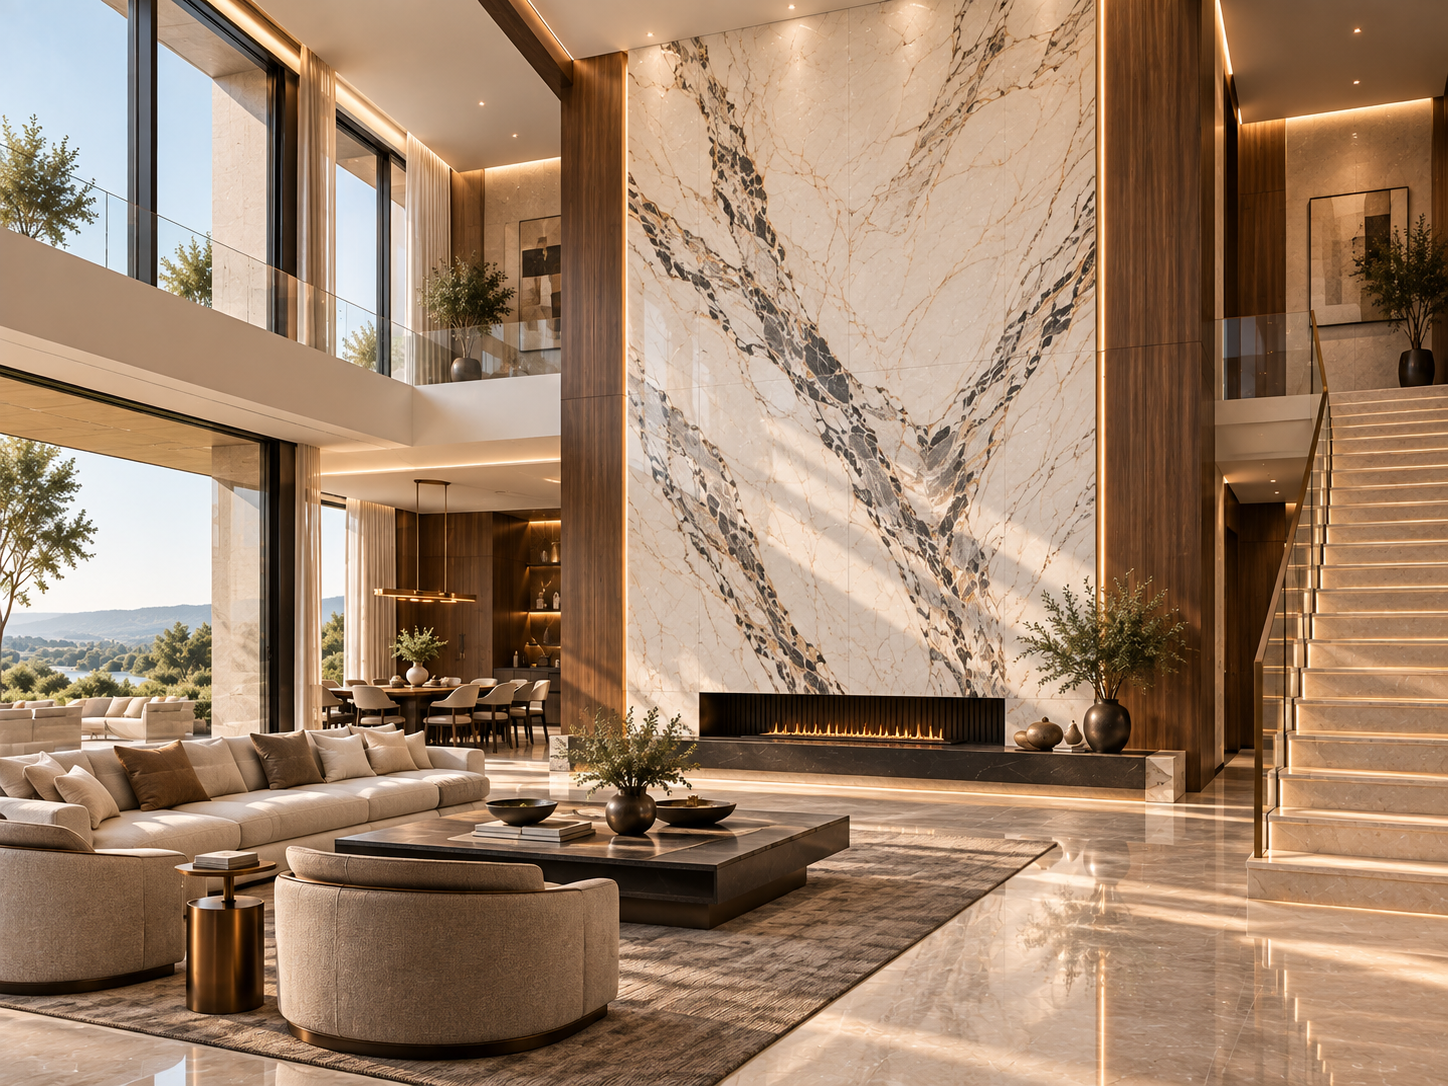
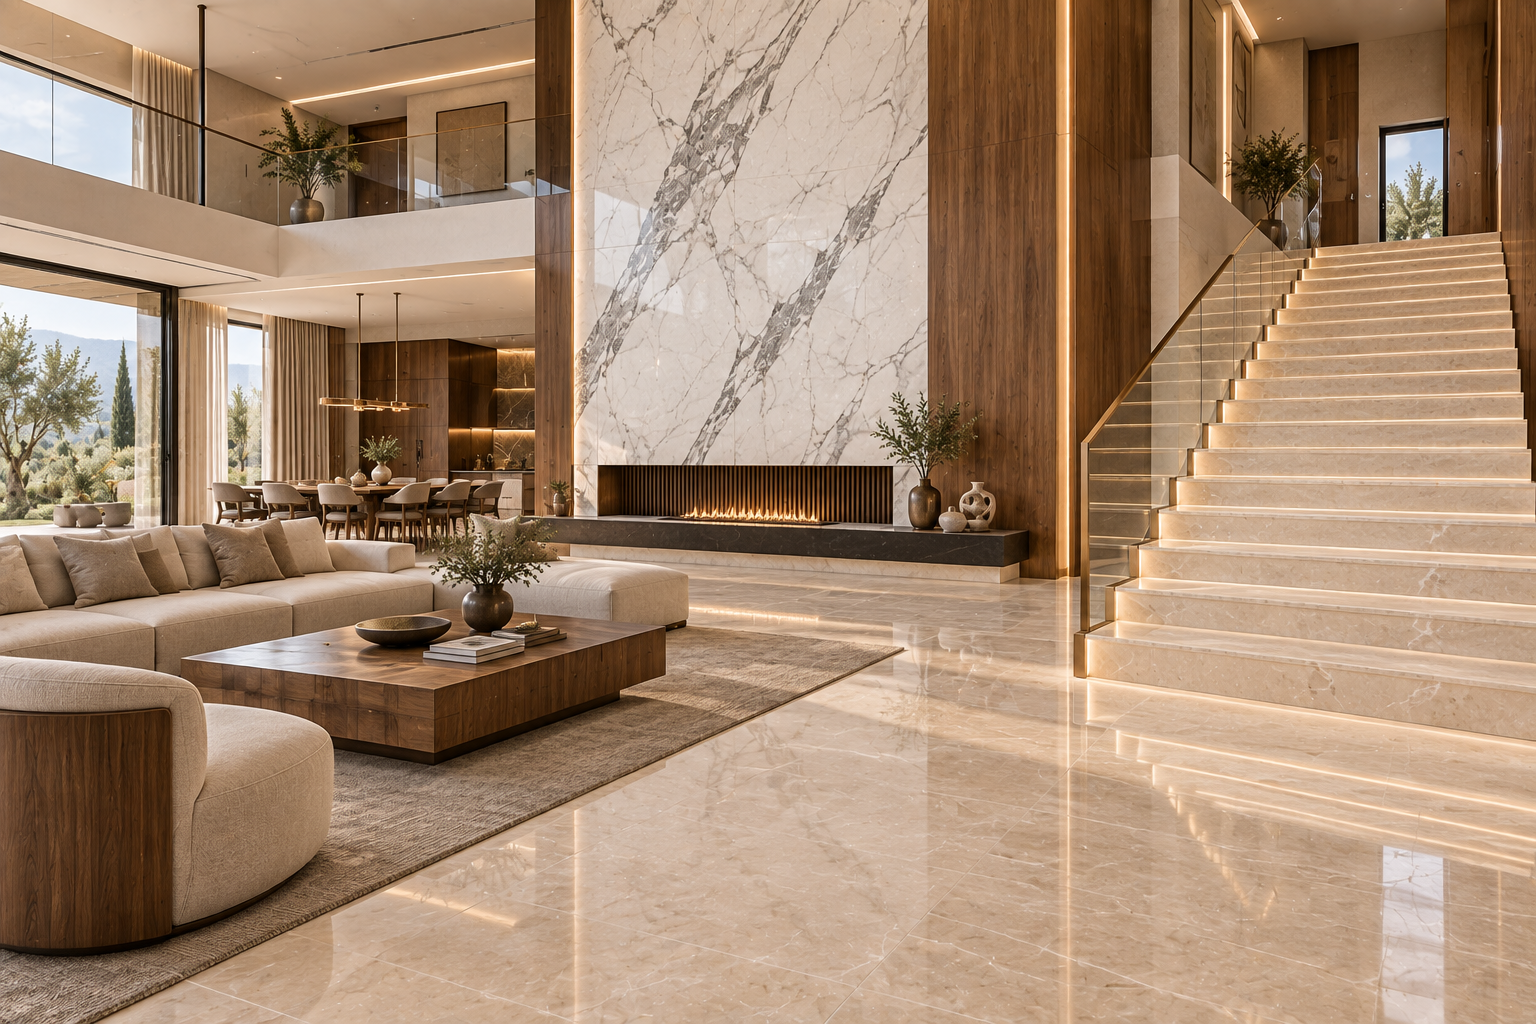
A double-height wall has the scale to carry a stronger stone. Statuario / Satvario, expressive white marble, Brescia Aurora or carefully bookmatched slabs can work because the full composition can be read from across the room and from the upper level. Confirm the wall dimensions and panel sequence before selecting or cutting the slabs.
Keep the foundation floor and large furniture pieces visually quieter. Coordinate the fireplace, lighting and timber framing so the stone reads as architecture rather than a sample displayed at oversized scale.
04 — Dining room.
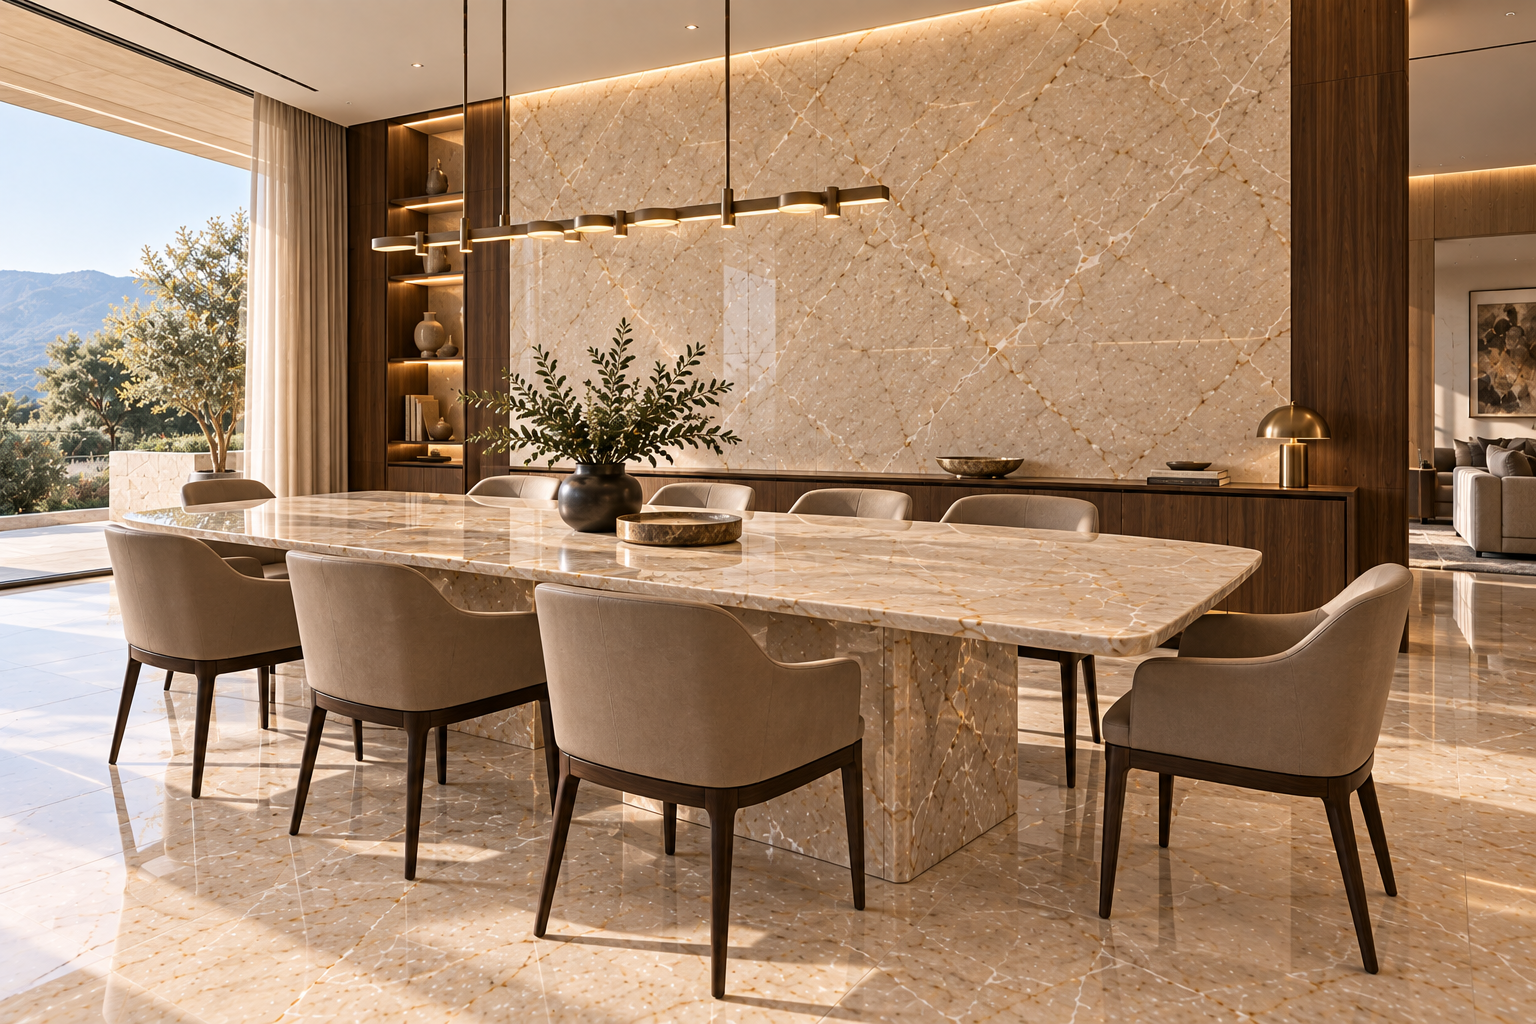
Dining spaces can take slightly more material drama because the table provides a clear centre. Choose one route: keep a quiet floor and give the dining backdrop a statement slab, or keep the room’s walls restrained and let a selected stone table become the focal point. Using marble on the floor, full wall, table and island at once can erase that hierarchy.
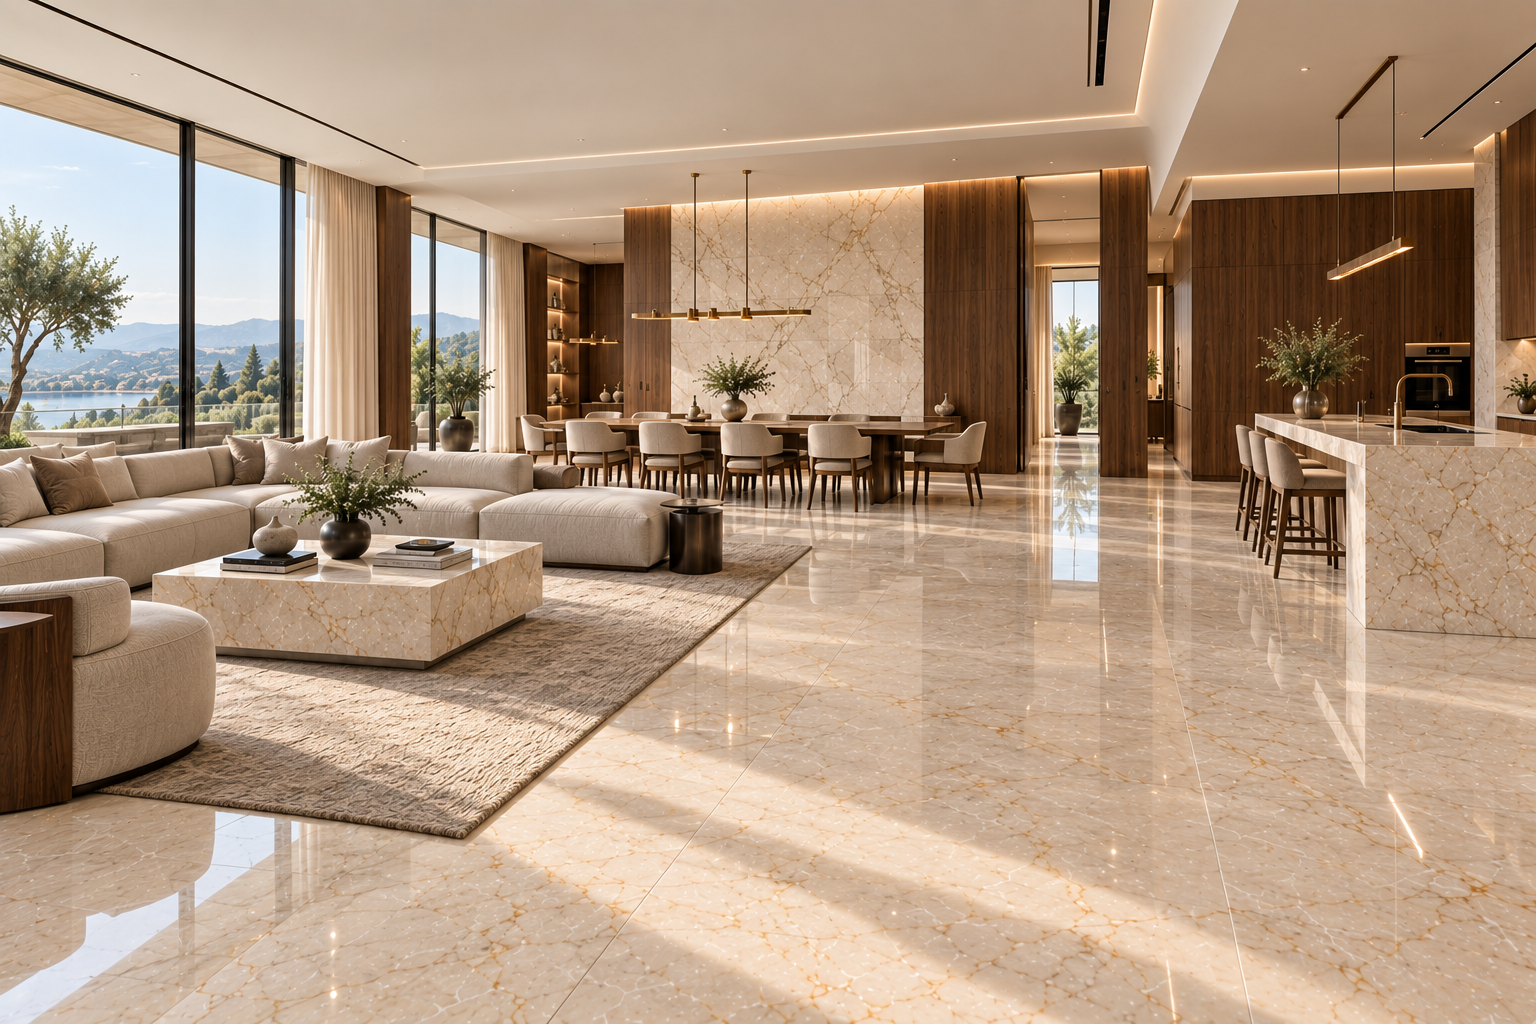
Check the dining table’s size, pendant position, chair clearance and wall sightline together. If the room connects directly to the living area, the floor will usually work best as one continuous foundation material.
05 — Open-plan living + dining.
When living and dining share one open volume, plan them as one floor project. Continue the same foundation marble across the connected area, then distinguish the functions with rugs, furniture arrangement, ceiling treatment, lighting and one selective feature surface. A floor change should have an architectural reason, not simply mark where the dining table begins.
| Spatial condition | Useful direction |
|---|---|
| Living and dining directly connected | Continue one primary floor marble |
| Dining visually separated by architecture | Differentiate through a wall, table or coordinated accent |
| Different floor levels | A material transition can feel more natural |
| Doorway or clear threshold | A second stone may work if tones and edges are resolved |
| One large open hall | Avoid arbitrary changes in floor direction or marble |
06 — Staircase.
The staircase is a three-dimensional link between floors and is often visible from the entrance, living room and upper landing at the same time. Treat it as part of the main circulation composition, not as leftover flooring material.
Before fabrication, confirm tread and riser dimensions, landings, slab thickness, vein direction, edge profile, nosing detail and how the stone meets the floor at each level. Review the finish for the intended use and consult the project team on slip performance, especially where the stair may be wet or exposed to outdoor shoes.
Three strategies are reliable: continue the same marble for a seamless stair; choose a compatible selection from the foundation family for slightly more movement; or use a deliberate contrast that is repeated or supported elsewhere in the palette. Avoid selecting from a small offcut without checking the full tread sequence.
07 — Family lounge.
The family lounge can feel softer and more relaxed than the formal living room. It usually does not need a second dramatic stone: continue the foundation floor where the space connects, or choose a calm compatible material if a doorway or level change creates a clear boundary.
Let rugs, timber, upholstery, books and artwork bring in warmth. A lower-contrast floor also gives flexibility if the room’s furniture changes over time. If the lounge opens onto a terrace, review the indoor-to-outdoor transition and cleaning needs before confirming finish and edge details.
08 — Bedrooms.
Most bedrooms benefit from a quieter visual field than the public rooms. Consider the room’s daylight, wall colour, timber tone and textiles first, then choose a floor whose movement supports a restful atmosphere. A low-movement marble is not automatically the right choice; it still needs to harmonise with the palette and be available in a sufficiently compatible lot for the area.
| Bedroom palette | Possible marble direction | Design note |
|---|---|---|
| Warm, layered luxury | Cream or beige; calm Botticino | Echoes warm fabrics and natural timber |
| Minimal contemporary | Venatino or fine-veined light stone | Keep contrast and movement measured |
| Bright modern | Vietnam White or a light selection | Check undertones in both daylight and lamplight |
| Classical | Botticino or compatible warm marble | Works with mouldings and traditional detailing |
| Dark wood interior | Light beige or restrained white | Balance deep joinery without a stark clash |
| Light oak interior | Warm beige or fine-veined white | Compare samples against the actual oak finish |
Where multiple bedrooms share a corridor, a consistent secondary marble can make the floor plan feel calm and can simplify procurement, while rugs and room-specific furnishings provide individual character.
09 — Master bedroom.
The master bedroom may support a more tailored application: a quiet floor, a selected TV or bed backdrop, a dressing-area vanity, or a considered transition into the ensuite. Choose the focal surface only after the headboard, wall finish, lighting and major furniture positions are known.
If the room already has dramatic fabric, strong wallpaper, sculptural lighting or dark joinery, the marble can be the grounding element. When a feature slab is used, align its main movement to the architectural composition and review the full piece at a realistic viewing distance.
10 — Master bathroom.
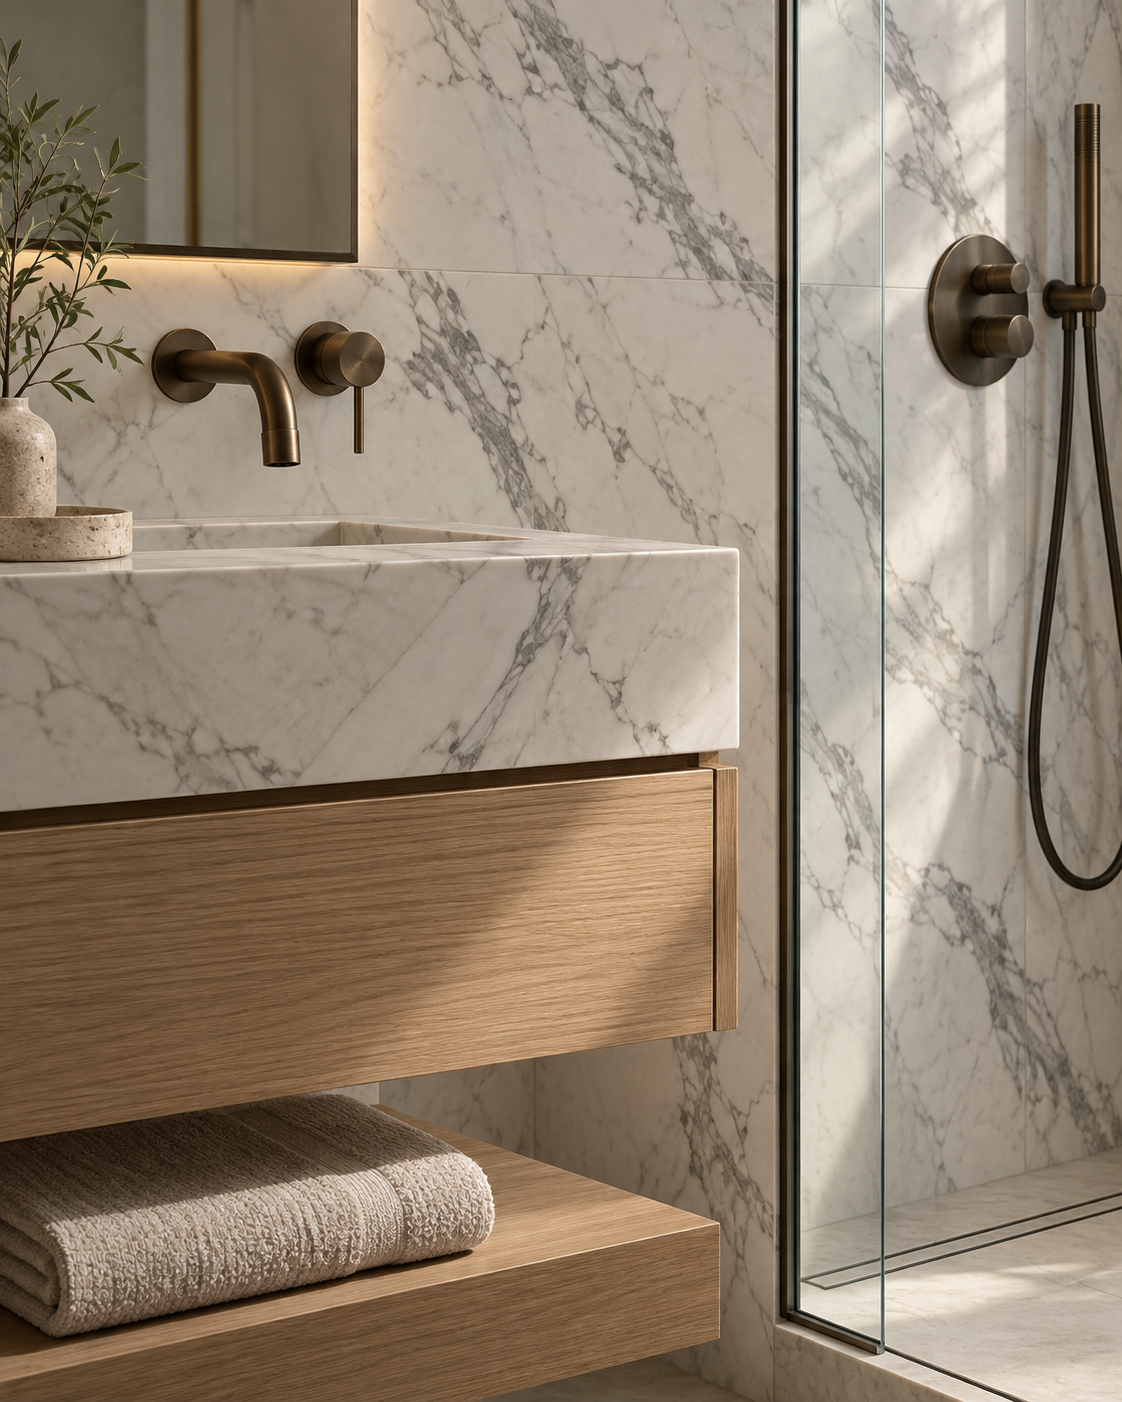
The master bath is a contained setting where a second marble family can introduce a distinct mood. Statuario / Satvario can create a dramatic wall; Venatino a softer white-grey atmosphere; Vietnam White a bright field; and Brescia Aurora a warmer, more layered character. These are starting points—compare actual material against the bathroom lighting, cabinetry and metal finish.
Build a hierarchy rather than covering every plane in equal visual intensity. For example: one expressive shower wall, a quieter floor and an oak vanity. Choose floor finish and detailing for the wet environment, and review maintenance, drainage, grout joints and transitions with the project’s architect or installer before ordering.
| Bathroom element | Planning check |
|---|---|
| Feature wall or shower backdrop | Confirm slab sequence, vein direction and niche/cut-out positions |
| Floor | Prioritise suitability for wet use, drainage and cleanable joints |
| Vanity and basin area | Review splash exposure, edge profile, support and maintenance |
| Whole-room palette | Pair one hero surface with quieter stone and a warm material |
11 — Powder room.
A powder room is a contained place to use a more expressive slab. A dramatic vanity wall, sculptural basin surround or a stronger colour can make a memorable moment without carrying that intensity through the full villa. Review the slab at the room’s actual scale and under its planned lighting; a small room can magnify contrast.
Keep the remaining surfaces edited. One focal stone, a complementary floor and a considered mirror or metal finish are often enough. Confirm cut-outs, tap locations, basin support and edge treatment before fabrication.
12 — Kitchen.
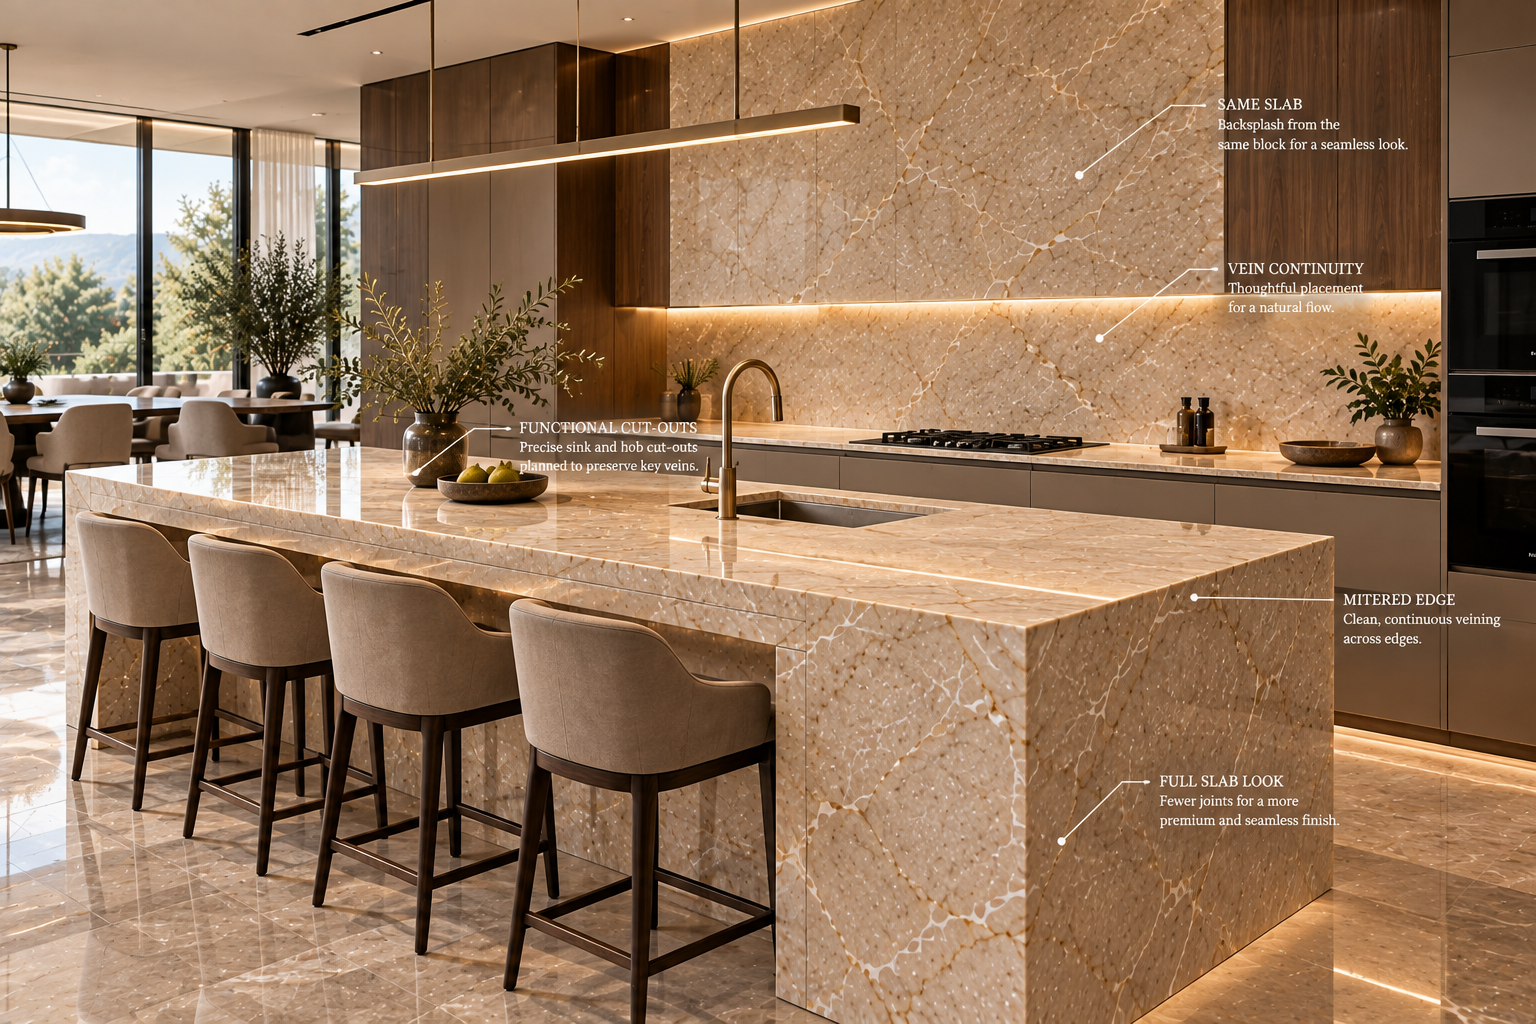
Kitchen marble has to work visually and practically. For the floor, consider continuity with living and dining, cleaning routines, surface finish and suitability for the household’s use. For an island or countertop, review the exact slab dimensions, finish, expected contact with acidic or staining substances, edge profile, support and maintenance requirements with the fabricator.
Do not approve an island slab from a small sample or cut before seeing the intended template position. Establish the finished island dimensions, place the template on the chosen slab, decide where the principal veins should fall, and then confirm the cut and any waterfall edges as one composition.
FINAL ISLAND SIZE → PLACE TEMPLATE ON SLAB → POSITION THE VEINS → CONFIRM THE CUT
13 — Dining table.
A marble dining table is a framed view of one slab. Judge the part that remains visible inside the final tabletop outline, not only the full slab standing upright. Check where the dominant vein lands, whether the centre feels balanced, whether movement runs with or across the table, and how the edge profile changes the perceived thickness.
Confirm dimensions, support, overhang, cut-outs and finish with the fabricator before final selection. For a custom furniture piece, the exact slab composition can matter more than the average appearance of the wider lot.
14 — Study / home office.
A study usually benefits from restraint because books, screens, artwork and joinery already add detail. Let the desk and cabinetry lead, then use marble as a quiet floor, a modest desktop accent or a controlled backdrop. Avoid placing a busy stone directly behind a screen or across a wall already divided by shelving.
| Joinery direction | Marble to compare | Palette note |
|---|---|---|
| Dark walnut or deep stained wood | Light Botticino, Venatino, Vietnam White or subdued cream | Lift the room while avoiding a stark undertone clash |
| Light oak | Warm beige, Botticino or fine-veined white | Compare samples against the actual oak finish |
15 — Guest bedrooms.
Guest rooms are an opportunity to simplify, not to introduce another costly statement marble just to make each room different. Continue the villa’s calm secondary stone, repeat a consistent skirting and threshold detail, and let textiles or artwork supply room-specific character.
If guest rooms sit along the same corridor, plan their quantities and lot requirements together. That supports a more consistent appearance and makes procurement and replacement planning easier.
16 — Corridors & passages.
Corridors are easy to overlook in a room-by-room presentation, yet they connect the rooms and may account for a meaningful share of the floor area. Include them in the foundation-marble quantity, lot and cutting plan from the beginning.
Set the direction of the tile or slab layout, coordinate thresholds and skirting, and check how joints meet doorways and intersections. Avoid filling long passages with unrelated leftovers: a visible shade shift can make the transition feel accidental. Planned offcuts are useful when their tone, direction and dimensions suit the location.
17 — Lift lobby.
A lift lobby is a compact transition zone and can take a measured accent without interrupting circulation. One reliable approach is to continue the main villa floor through the landing, then use a statement slab on the lift wall or a carefully detailed surround.
Review the lift-door finish, lighting, wall panel sizes and floor joints together. Keep the landing surface appropriate for frequent foot traffic and make sure the change in material is intentional from both the corridor and the lift interior.
Room-by-room marble planning.
Use this as a starting framework, then adjust it to the architectural plan, available lots, desired tone and slab dimensions.
| Villa area | Marble role | Recommended character | Key priority |
|---|---|---|---|
| Entrance & foyer | Foundation + focal | Calm floor, one stronger wall | First view and thresholds |
| Formal living | Foundation | Balanced movement | Lot consistency |
| Double-height living | Statement | Expressive, full-slab composition | Wall scale and panel sequence |
| Dining room | Foundation or focal | Controlled | Relationship with table |
| Open-plan living + dining | Foundation continuity | One connected floor | Zone with furniture and lighting |
| Staircase | Continuity | Directional, coordinated | Treads, risers and landings |
| Family lounge | Foundation or secondary | Quiet and warm | Comfort and transitions |
| Bedrooms | Secondary | Calm | Low visual intensity |
| Master bedroom | Secondary + selected accent | Tailored to joinery | Coordinate backdrop and ensuite |
| Master bathroom | Secondary or statement | Light or expressive | Wet-area detailing and hierarchy |
| Powder room | Statement | Dramatic if desired | One memorable surface |
| Kitchen | Functional + focal | Controlled | Use, finish and cutting plan |
| Dining table | Statement | Complete slab composition | Template positioning |
| Study / home office | Foundation or secondary | Quiet with timber | Joinery and screen backdrop |
| Guest bedrooms | Secondary | Simple and consistent | Repeat detailing and lot |
| Corridors & passages | Foundation | Continuous | Direction and efficient cutting |
| Lift lobby | Foundation + optional accent | Connected with one focal wall | Door, wall and floor junctions |
How many different marbles should a villa use?
There is no universal number. For many homes, two to four carefully related marble families are enough to create variation without making every room a separate scheme. One possible starting palette is Botticino Classico or another restrained warm stone for connected floors; Statuario / Satvario for a few statement surfaces; Venatino or Vietnam White for quieter light rooms; and Brescia Aurora as an optional warm accent. The selected slabs, architecture and available compatible lots should decide the final mix.
Botticino or a restrained warm selection across the main floor, passages and connected public rooms.
Venatino, Vietnam White or a calm complementary stone for bedrooms, vanity areas and selected bathrooms.
Statuario / Satvario, Brescia Aurora or another expressive slab for a feature wall, powder room or furniture piece.
A simple villa material map.
Sketch these roles onto the floor plans before requesting quantities. The examples below are a planning framework, not a specification; verify every application against the actual slabs and project details.
Public & connected
Entrance · living · dining · passages
Botticino or a restrained warm marble for continuity.
Feature wall
Statuario or another expressive slab, positioned after wall dimensions are final.
Stair & landing
Foundation marble or a compatible selection that links both floors.
Private & quieter
Master bedroom
Venatino or a calm secondary stone, coordinated with joinery and fabrics.
Master bathroom
Quiet light marble with one optional focal surface.
Other bedrooms
Repeat a calm family and consistent detail for a composed corridor.
Contained focal points
Powder room
Brescia Aurora or another selected statement slab.
Dining table / island
Choose the actual slab after placing the final template.
Lift lobby
Continue the floor and consider one accent wall.
Warm marble and white marble can work together.
Rather than forcing one colour family through every room, give warm and white stones different jobs. Check the undertones together in daylight and under the project’s warm evening lighting; a photo or small sample may not show how neighbouring slabs will read at full scale.
Warm marble
Examples: Botticino, Brescia Aurora, Marmi Crema.
Can bring warmth, visual comfort and continuity, and can sit naturally beside timber. Review the exact beige or honey undertone against the wood and wall colour.
White marble
Examples: Statuario, Venatino, Vietnam White.
Can bring brightness, contrast and a focal quality. Use the degree of veining and contrast deliberately so the white stone complements rather than competes with the foundation.
The 70 / 20 / 10 approach.
Use this as a visual-planning prompt, not a fixed quota or a purchasing formula. It asks whether the foundation is doing most of the connecting, the secondary stone is supporting selected rooms, and the most expressive stone is genuinely limited to focal areas.
Illustrative proportions only. Actual quantities depend on the floor plan, applications, slab dimensions, cutting and the design team’s intent.
What makes a villa look expensive?
It is rarely the amount or price of the stone alone. A quieter palette can look more resolved when its details are planned as a whole:
- Large, uninterrupted pieces where the room scale supports them.
- Joint positions aligned with the architecture and sightlines.
- Controlled transitions between connected spaces and other materials.
- Compatible lots for large continuous areas.
- Thoughtful edge details at stairs, thresholds, counters and furniture.
- Lighting that reveals the surface without exaggerating glare or contrast.
- Consistent tone and finish between adjoining rooms.
- Restraint: the statement slab has room to be seen.
A villa covered in many premium marbles can still feel confused. A smaller coordinated palette can feel more distinctive because each material has a purpose.
Ten common villa marble mistakes.
- Selecting each room separately. The finished house loses continuity across sightlines and thresholds.
- Using the most expensive marble everywhere. Price does not automatically create hierarchy or suit every application.
- Choosing too many varieties. The villa can start to feel like a sample gallery rather than one home.
- Ignoring staircase continuity. The central circulation space may feel detached from both floors.
- Changing the floor between connected rooms. Open-plan architecture can become fragmented without a clear threshold.
- Choosing feature marble before the architecture is final. Important veins or bookmatch lines may miss the finished dimensions.
- Mixing warm and cool whites without co-review. Undertone differences become more visible across broad surfaces.
- Selecting only from phone photographs. Screens can alter tone, contrast and apparent finish.
- Planning without slab dimensions. The desired layout may not cut efficiently from the actual material.
- Delaying additional material. A later lot may not match the original; plan compatible quantity and reserve requirements early.
The better villa marble selection sequence.
Follow a project-wide order so the slab decisions respond to the architecture and to one another:
- Start with the architectural plan. Mark sightlines, connected rooms, levels and fixed joinery.
- Set the room hierarchy. Identify public, private, wet and statement zones.
- Choose the foundation family. Establish the material that will link the main floors and passages.
- Choose secondary stones. Assign calmer or more personal selections to the rooms that need them.
- Choose statement applications. Set aside expressive slabs for locations with the right scale and viewing distance.
- Review full slabs. Compare colour, movement, finish and undertones in person, not from a screen alone.
- Confirm compatible lots. Check that the selected quantity for each continuous area works together.
- Allocate slabs by room. Record where each slab or lot is intended to go.
- Prepare the cutting plan. Place templates, plan vein direction and account for edges, cut-outs and usable limits.
- Dry-lay critical compositions. Review floor runs, bookmatch pairs, stairs and statement walls before fixing.
- Confirm installation and reserve needs. Align finish, joints, transitions and any future replacement material with the project team.
A Fratelli Singh villa-selection approach.
For a large residence, the Fratelli Singh selection discussion considers the whole project rather than asking only which stone looks attractive. Bring architecture, scale, material hierarchy, lot availability, slab dimensions, processing and the final composition into the same review:
Architecture & scale
Which spaces connect visually? How large are the surfaces, and from where will each be seen?
Material hierarchy
Which marble is the foundation, which is secondary, and where is a statement slab justified?
Lots & dimensions
Can enough compatible slabs be allocated? Do their dimensions suit the proposed cuts and layout?
Processing & composition
How will finish, thickness, edges, vein direction and the final installed sequence work together?

Before you finalise
Villa marble planning checklist.
Work through these decisions with the architect, designer, supplier and fabricator before confirming the order.
Keep the decision sequence simple
A simple rule to remember.
Do not choose marble room by room. Choose in this order:
VILLA→ZONE→APPLICATION→MARBLE→SLAB
This is how a home begins to feel intentionally designed rather than assembled one room at a time.
Clear answers
Frequently asked questions.
Which marble is best for a luxury villa?
There is no single best marble for every villa. The choice depends on the architecture, interior palette, room size, natural light and desired vein movement. Many projects work well with one calm foundation marble and one or two more expressive stones.
Is Botticino suitable for villa flooring?
It can be a suitable direction for large connected areas because its warm beige character may provide continuity without dominating the room. Review the specific slabs, finish and project requirements before deciding.
Can Statuario be used throughout an entire villa?
It can be used broadly, but highly expressive Statuario may feel visually intense across very large areas. It is often effective when reserved for selected statement applications.
Should the living room and dining room use the same marble?
If they are visually connected, continuing the same primary flooring usually creates stronger architectural continuity. A change may work where the plan establishes a clear threshold, level change or separate room.
Should the staircase match the flooring?
Continuing the same marble or a compatible family often links the floors well. A contrasting stair can also work when it is intentional and its treads, risers, landings and transitions are planned together.
How many marble varieties should one villa use?
There is no fixed number. Two to four related families can provide useful variation in many homes, but the architecture, actual lots and applications should guide the final palette.
Which marble is suitable for bedrooms?
Restrained beige, cream or fine-veined light marble can support a quieter mood. Compare the actual slabs with the room’s daylight, wall colour, timber and textiles.
Which marble works well in bathrooms?
Statuario, Venatino and Vietnam White can create light or expressive surfaces, while Brescia Aurora can bring warmth. Choose wet-area finishes and details with the architect and installer, especially for floors.
Can warm beige and white marble be used in the same villa?
Yes. Warm marble can provide continuity while white marble is used selectively for brightness or emphasis. Compare the undertones together under both daylight and planned artificial lighting.
Should all the marble be purchased at the same time?
For large continuous areas, securing enough compatible material together can reduce the risk of needing to match a different lot later. Confirm quantities and reserve needs with the project team.
Should marble be selected before the interior furniture?
Stone and the broader interior palette should inform one another. Review marble alongside timber, wall colour, metal finishes, lighting and key furniture so undertones and visual weight work together.
How much extra marble should be planned for a villa?
The allowance depends on room geometry, slab dimensions, layout, stairs and matching requirements. Calculate it from the project’s cutting plan rather than applying one percentage universally; see the quantity and wastage guide for the planning method.
Planning marble for a villa?
Bring the floor plan, approximate area, preferred palette and intended applications. Fratelli Singh can help you compare full slabs and plan a coherent material selection across the residence.
Request assistance ↗