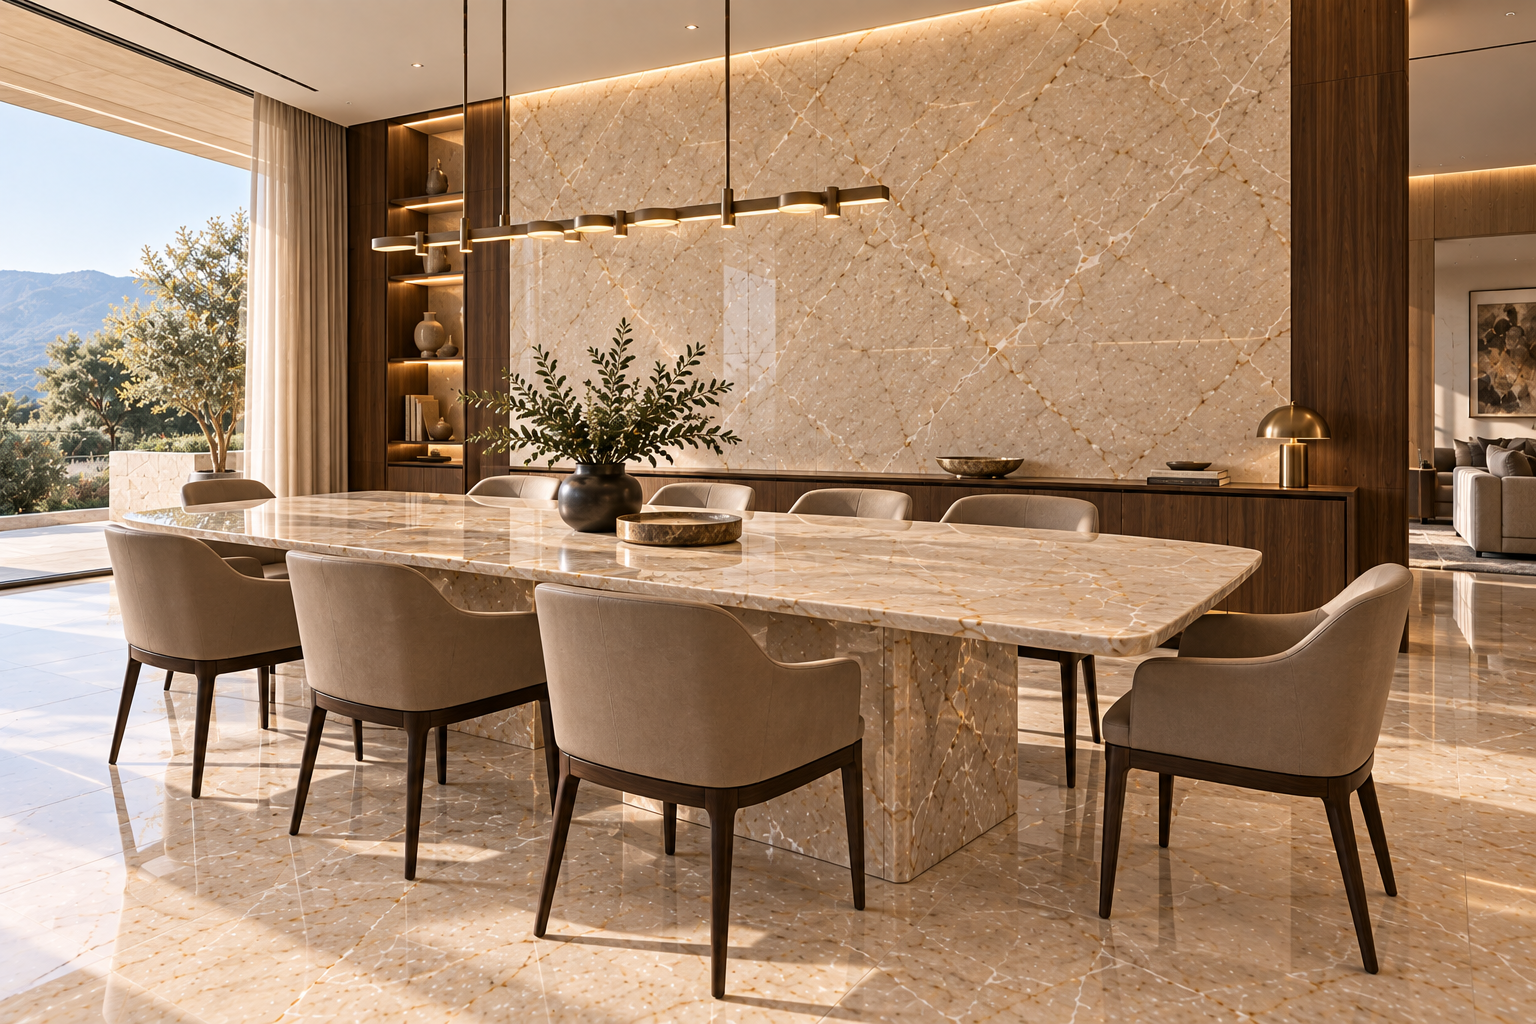
A beautiful slab does not automatically make a beautiful table. Selecting marble for flooring is different: several pieces can combine into one broad field, while a table or island may depend on a carefully positioned cut from one slab. A small change in cut position can make the finished object balanced, dramatic, awkward or exceptional. Quick answer: confirm the dimensions, view the full slab, place and rotate the template, then approve the exact composition together with the edge, support, cut-outs, finish, transport and care expectations.
Before you choose a slab
Start with the finished object.
Use this checklist to connect the design, stone and fabrication decisions before approval.
| Check | Why it matters |
|---|---|
| Finished dimensions | Confirms that the slab can provide the actual piece. |
| Usable slab area | Nominal dimensions may include areas unsuitable for the cut. |
| Vein position and direction | Controls the composition and perceived shape. |
| Edge condition | Exposed edges and corners are part of the finished design. |
| Joint requirement | Determines whether one piece is feasible or a planned seam is better. |
| Edge profile | Changes the furniture’s character and fabrication detail. |
| Support structure | The stone top and its base or cabinetry must be coordinated. |
| Surface finish | Changes reflection, appearance and maintenance expectations. |
| Cut-outs | Sink, hob and tap openings change the usable composition. |
| Transport route | The finished piece has to reach and enter the room safely. |
| Reserve material | Offcuts may support coordinated secondary pieces when suitable. |
| Care expectations | Natural marble can etch and wear through everyday use. |
01 — Start with the finished object, not the slab.
Before visiting a stone yard, make a design brief for the piece. A dining table needs a confirmed length, width and shape; seating count and chair clearances; edge profile; base position; and intended orientation. An island also needs its final footprint, overhang, sink and hob locations, tap holes, outlets, seating side, waterfall ends, and any backsplash or upstand. Coordinate those dimensions with the cabinetmaker, appliance schedule and room plan.
The order matters: decide what the object must do, confirm its dimensions, choose a marble family, inspect full slabs, place and move the template, coordinate openings and edges, then approve the cut. Selecting an attractive slab first and deciding the object later can leave the best composition outside the usable area.
02 — One slab can contain several different table compositions.
The upper portion of a slab may have an open background and one elegant vein; the centre can hold dense movement and intersections; the lower area may be quieter. All three come from the same block, but each can make a different table. The marble name alone does not determine the result. The location and orientation of the finished template do.
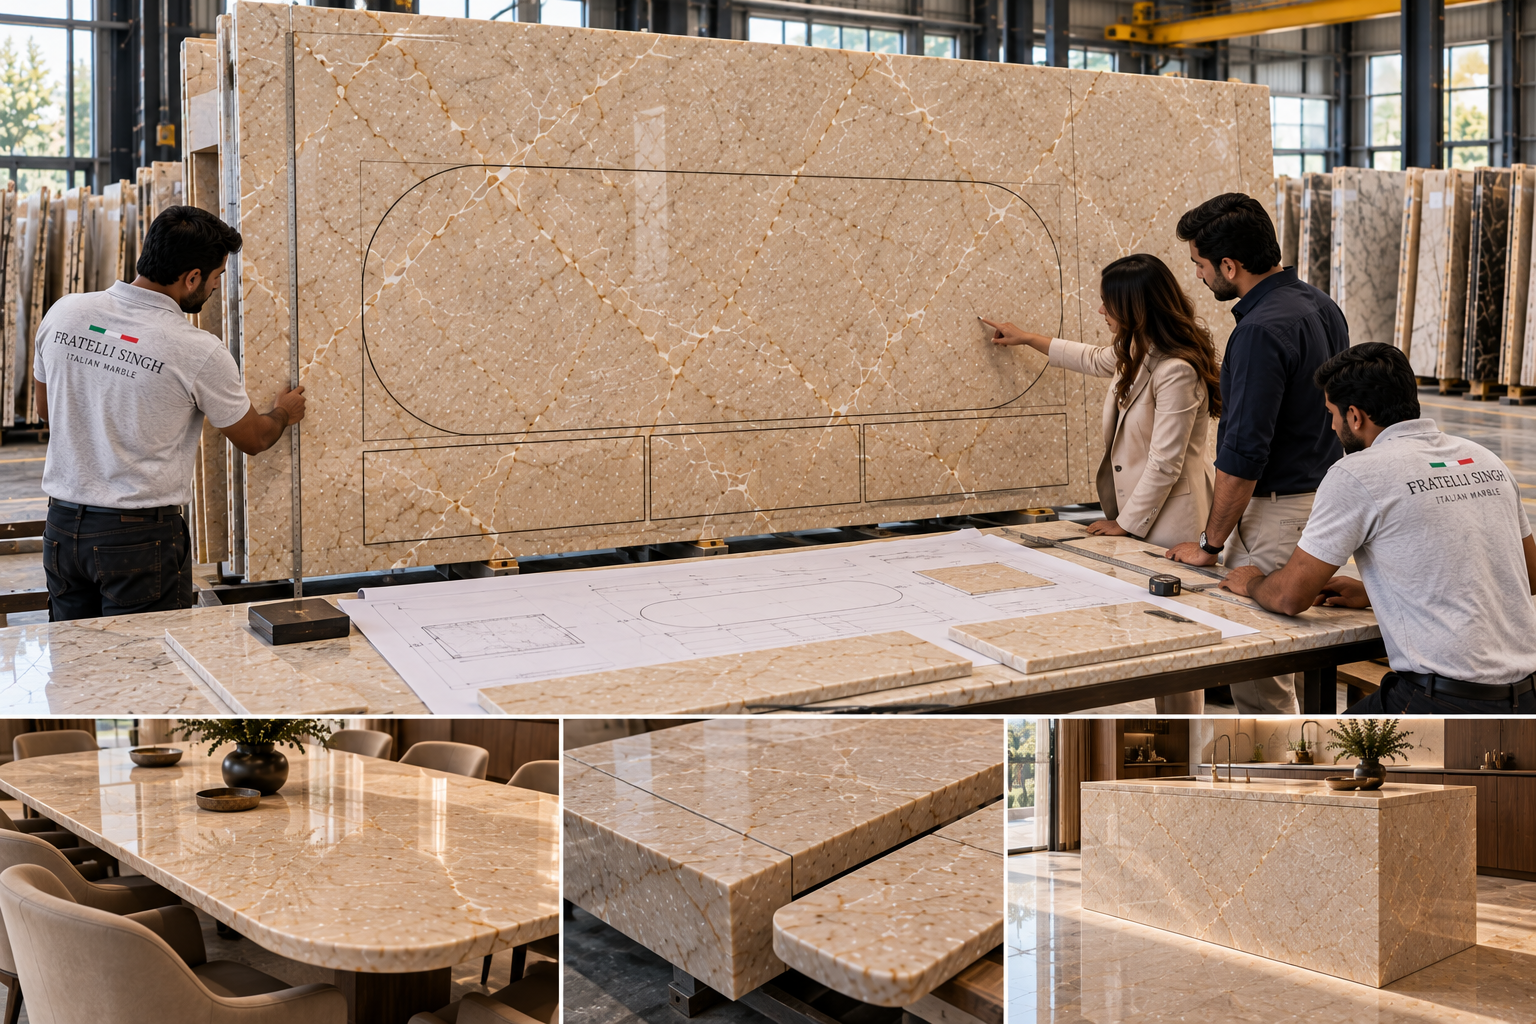
Move the template over the slab, inspect the full shape and perimeter, then view it from close range and from the room’s normal viewing distance. A straight-on photograph can help compare options without the visual distraction of the warehouse. Do not approve a cut until the chosen composition is clear.
03 — Vein direction changes the shape you perceive.
On a long dining table, movement that follows the length may reinforce an elongated feeling. Veining that crosses the width or travels diagonally can feel more dynamic. There is no universal correct direction; compare the slab with the table’s plan, room axis, base and seating arrangement. If the stone is strongly directional, test both orientations of the template, including a 90-degree rotation.
Think of the vein as part of the furniture’s composition rather than a pattern to centre by default. It can lead the eye toward a view, align with the room, or create a deliberate counterpoint. Approve the direction in the actual finished shape.
04 — Decide where the focal movement will land.
The strongest vein may end up under a vase, centrepiece or serving dishes; it may meet the edge, pass through the middle, or be removed by a sink opening. Consider the way the table will be dressed and used. A visible, balanced composition may be more successful than simply putting the most dramatic vein at the geometric centre.
Check the complete rectangle and all corners. An off-centre focal line can feel natural and considered when the surrounding background gives it room. For an island, map the sink, hob and tap before deciding where the focal area belongs.
05 — Match the marble character to the table and room.
A table is a contained surface that is seen at close range, so it can carry expressive stone without repeating that movement over a whole floor. The right amount of contrast depends on the rest of the room. A patterned floor, ornate chandelier, feature wall and bold rug may already provide plenty of visual activity; a quieter table can make that room feel more composed.
| Room or table direction | Marble character to review |
|---|---|
| Minimal contemporary | Venatino, quiet Statuario / Satvario or Vietnam White |
| Warm, understated luxury | Botticino or another balanced warm beige selection |
| Warm statement | Brescia Aurora, with a carefully selected movement zone |
| Dramatic focal table | Expressive Statuario / Satvario, composed within the final outline |
| Dark timber interior | Light marble for contrast, or Botticino for tonal warmth |
| Pale oak interior | Warm beige or fine-veined white, checked beside the actual oak sample |
| Classical dining room | Botticino or a warmer selection that complements the furniture |
These are design directions, not a quality ranking. Compare full slabs and finish samples with the flooring, cabinetry, chairs and metal finishes that will be in the room.
06 — Use Botticino for warmth and restraint.
Botticino brings a warm beige ground and typically softer tonal movement than a high-contrast white statement stone. That character can sit comfortably beside walnut, cream upholstery, bronze details and warm plaster. It is especially useful when the chandelier, chairs or wall treatment already carry visual weight and the tabletop should support the room rather than compete with it.
Review the actual slab: beige tone and natural movement vary. Confirm how its background reads beside the wood and fabric samples under both daylight and the proposed evening lighting.
07 — Compose Statuario / Satvario before cutting.
Statuario / Satvario can make the table a focal point because its grey veining is legible from across a room and at close range. For an expressive slab, position the strongest lines deliberately, keep awkward intersections from landing on exposed corners where possible, and review the whole rectangle from the expected approach and seating directions.
Rotate the table template both ways before deciding. A quarter-turn can change a vein from a crosswise interruption into a long directional line—or reveal a quieter area that better suits the design. The first placement is only a starting point.
08 — Consider Brescia Aurora for a warmer statement.
Brescia Aurora gives a richer, warmer statement than a cool white-and-grey palette. It can work with dark walnut, deeper timber, cream or ivory upholstery, bronze and warm plaster. As with any expressive stone, identify a balanced zone inside the finished outline; avoid choosing on a dramatic close-up that does not show how the full tabletop will read.
Place the slab beside the intended wood, fabric and metal samples. Check that the stone’s warmth complements rather than clashes with the room’s undertones.
09 — Plan a kitchen island as a coordinated technical layout.
An island combines the visual decisions of a table with functional constraints: sink, hob, tap holes, outlets, plumbing, cabinetry, seating overhang, waterfall ends and sometimes joints or a separate upstand. Each opening reduces the available stone and changes the composition. Coordinate the cabinet and appliance drawings with the slab plan before fabrication.
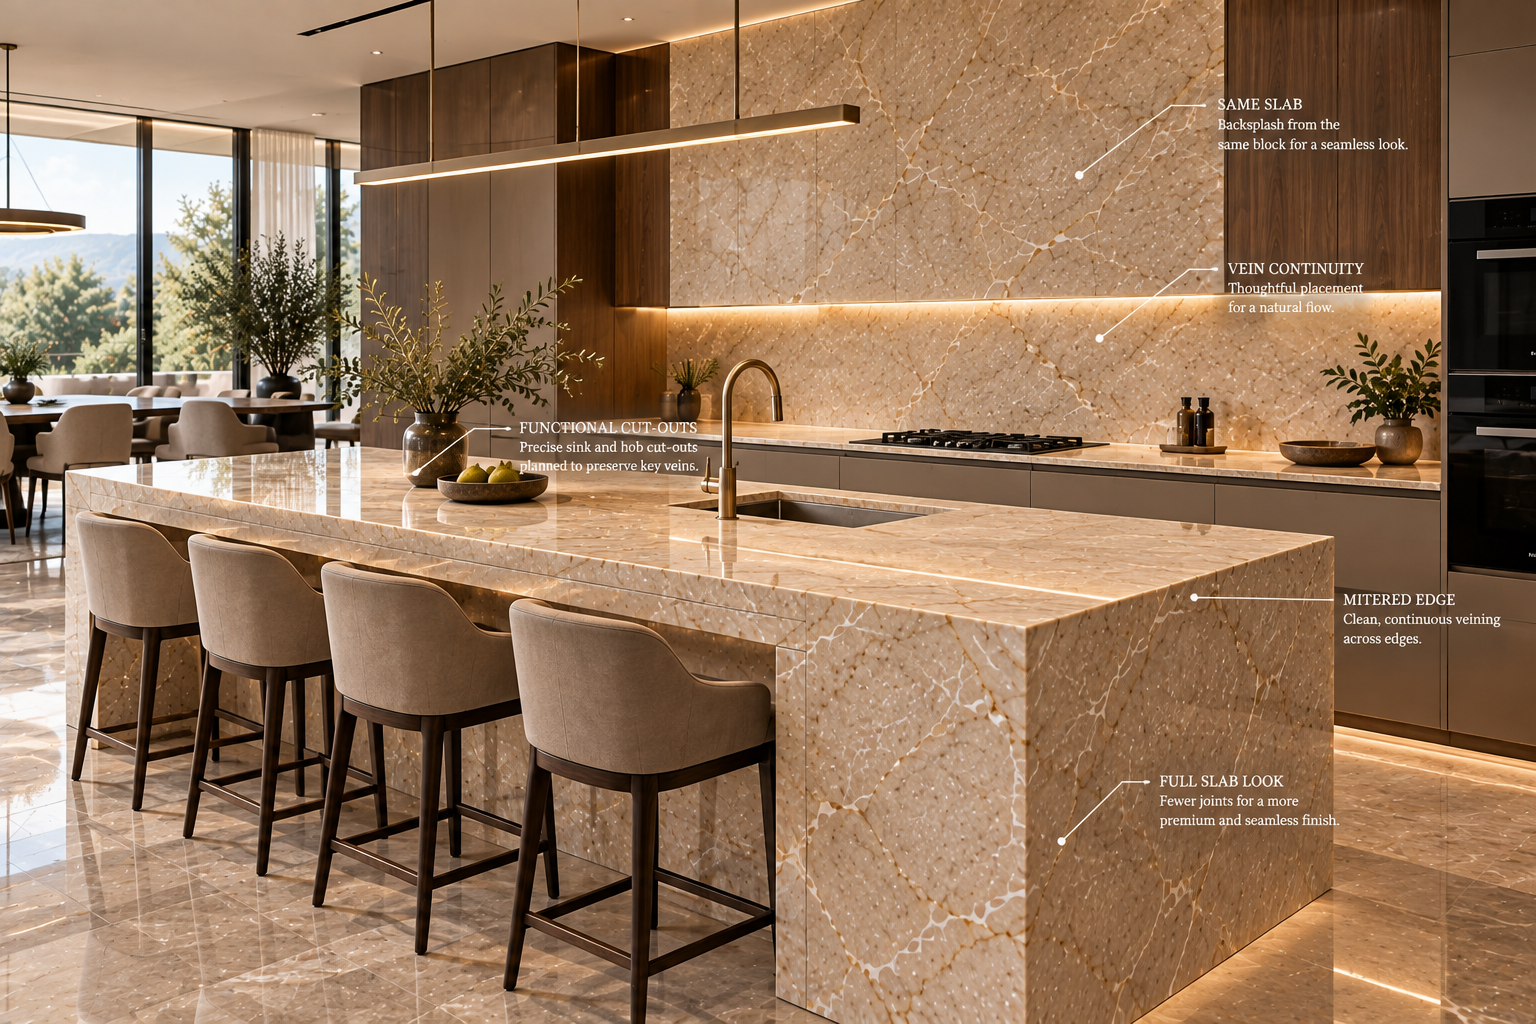
Do not let a sink or hob remove the focal part of the stone by accident. Mark the appliance cut-outs and inspect the remaining visible zones from the kitchen’s main approach and seating side.
10 — Overlay sink and hob cut-outs before slab approval.
Large openings can remove exactly the area that carries a slab’s strongest movement. Before approval, overlay the final cut-out templates, check their clearances from the slab edges and one another, review the vein placement around each opening, and confirm that the proposed shape is fabricable for the selected stone and thickness.
- Confirm the sink type, dimensions, mounting method and tap position.
- Confirm the hob model and its specified cut-out, ventilation and clearances.
- Mark outlets, accessory holes, joints and any upstand or backsplash pieces.
- Review the visible stone that remains around and between the openings.
Appliance and fabrication requirements are project-specific; use the approved manufacturer drawings and coordinate them with the stone fabricator rather than estimating openings from a photograph.
11 — Decide between one piece and a planned joint.
A single-piece island can read as a calm, uninterrupted surface, but it is not automatically the best or most practical solution. Feasibility depends on the slab’s usable dimensions, the finished size, safe handling, fabrication capacity, access through doors and turns, and installation conditions. A carefully placed joint can be a better outcome than an oversized piece that cannot be transported or safely set in place.
| Factor | One piece | Multiple pieces |
|---|---|---|
| Visual continuity | Uninterrupted when the slab and design allow | Depends on joint position and vein coordination |
| Handling and access | More demanding; route must be checked | Often easier to move and install |
| Slab requirement | Requires enough usable area in one piece | Can make more layouts possible |
| Vein planning | Plan the whole surface at once | Plan the relationship across the joint |
| Future repair or replacement | Can be more difficult | May allow a single section to be addressed |
The best choice depends on the project drawings, stone, structure and site—not on a blanket preference for “seamless.” Ask the fabricator to show the proposed joint location on the actual slab layout.
12 — Plan waterfall ends in sequence with the top.
A waterfall island carries the stone down one or both sides to the floor. The top and end panels should be planned as related cuts so the vein transition feels intentional. Check which end is most visible, how the pattern will turn at the corner, and whether the slab has enough compatible area for the top and sides. Selecting the panels independently can produce a discontinuity that looks accidental.
Review the top-to-side relationship with the fabricator before cutting. A natural vein may not continue perfectly across a mitre, so approve the actual proposed arrangement rather than assuming a photograph or a generic drawing guarantees a match.
13 — Choose an edge profile for the furniture’s character.
The edge is visible and touchable, and it changes the perceived style of the same slab. A thin straight edge is crisp and contemporary; a small chamfer softens the line; a rounded edge feels gentler and more traditional; and a mitred or built-up detail can create a thicker visual profile. Consider the table’s silhouette, the room and how the edge will be used before specifying it.
Agree the profile with the fabricator before work begins. Profile options can depend on the stone, thickness, corner shape and fabrication method, so do not assume every edge is suitable for every design.
14 — Separate visual thickness from actual stone thickness.
A substantial-looking top does not always need to be made from an unusually thick solid piece. Depending on the design, fabricators may create a thicker visual edge with mitred returns, built-up detailing or a supporting structure. The appropriate construction depends on the stone, edge geometry, spans and intended use.
Review a cross-section or full-size edge sample and have the fabricator explain how the detail is assembled and supported. Choose based on the complete design and technical recommendation, not appearance alone.
15 — Design the support structure with the stone top.
Marble is heavy, and a cuttable slab is not automatically a structurally suitable finished object. Design the top and its support together. For a dining table, coordinate the span, frame or pedestal positions, cantilevers, table stability and chair clearance. For an island, coordinate the cabinetry, overhang, appliance locations, cut-outs and any concealed reinforcement with the stone plan.
Have a qualified fabricator or project professional confirm the support for the specific stone and design. Avoid relying on a generic online dimension or assuming that a base can be moved after the stone has been cut.
16 — Treat seating overhangs as an engineered detail.
A breakfast counter or island overhang depends on its depth, the stone and thickness, support locations, reinforcement strategy and how the finished surface will be used. There is no single “safe overhang” measurement that applies to every marble and installation. Confirm the support system with the fabricator or engineer for the actual project and show it on the coordinated drawings.
Include the overhang in the slab template from the start. It affects both the material required and the visual balance of the island, and it should not be added after the cut plan is approved.
17 — Compare polished and honed finishes in the intended light.
Polished marble tends to show stronger colour depth, vein contrast and reflected light. Honed or lower-gloss marble can feel softer and more understated, with less specular reflection. Neither finish is universally better; choose by the desired appearance, use and maintenance expectations, and confirm which finishes are suitable for the specific stone.
Dining pendants and concentrated task lights can create glare or make the veins appear stronger. View the finish under lighting close to the final room conditions. Where possible, compare a representative sample or finished piece beside the slab instead of judging only under warehouse lights.
18 — Understand marble’s response to acids and everyday use.
Marble is a calcium-based natural stone and can be etched by acids. Lemon, vinegar, wine and some fruit juices may dull or mark the surface, especially when left in contact with a polished finish. Sealer can help reduce some liquid absorption risks, depending on the stone and product, but it does not make marble acid-proof, stain-proof or immune to wear.
Decide whether the natural patina of use is acceptable. If the expectation is a permanently pristine, factory-like surface in a heavily used kitchen, discuss that honestly before specifying marble. Follow the stone supplier’s care guidance and test any cleaning product on an inconspicuous area.
19 — A dining table and a kitchen island are different use cases.
A dining table may see occasional spills and close visual inspection. A kitchen island is more likely to encounter frequent food preparation, water, acidic ingredients, appliance openings and heat-related use around equipment. The same slab can work in either setting, but the practical trade-offs and fabrication coordination are not identical.
| Consideration | Dining table | Kitchen island |
|---|---|---|
| Food and acid exposure | Possible | Usually more frequent |
| Sink or hob cut-outs | Rare | Common |
| Water exposure | Generally lower | Often higher around sink and prep zones |
| Heat-related use | Occasional hot serving items; use appropriate protection | Coordinate cooking appliances and follow the fabricator’s guidance |
| Visual priority | Very high | High, alongside function |
| Fabrication and support | Dimensions, edges and base support | Openings, joints, services, overhang support and access |
Do not choose solely because a dining-table photograph looked beautiful. Consider the actual use, care expectations and technical requirements of the intended surface.
20 — Check the slab perimeter before placing the template.
Furniture exposes its perimeter, so a slab’s centre can look beautiful while a damaged or visually unsuitable edge falls exactly where the finished outline needs to run. Before approving the position, mark the proposed shape, inspect all sides and corners, note any chips, fissures or natural features, and move the template if the perimeter composition needs improvement.
- Mark the finished outline and any required fabrication allowance.
- Inspect the complete perimeter and each corner in good light.
- Review how veins meet the edges and whether a feature will be cut through.
- Ask the fabricator to assess any concern before final approval.
- Reposition the template if the usable, balanced area changes.
21 — Allow for a different slab layout for round and oval tables.
Rectangular tops depend heavily on the slab’s corners and perimeter. A round or oval top uses a different cutting envelope, so the best zone may change: an area that is inefficient for a rectangle can work well for an oval, while a striking rectangular composition may lose its character when clipped into a circle. Place the actual full-size shape on the slab and inspect the offcuts as well as the finished top.
Include the table’s base and seating in the review. The chosen shape should fit the room and leave practical circulation space, not simply make the most efficient use of the stone.
22 — Coordinate pedestal position with the stone composition.
The table base is sometimes selected after the top, but its location can affect both structure and the way the finished piece reads. Coordinate the pedestal or frame with the strongest vein, the table’s balance and centre, seating positions and legroom. If supports interrupt or hide a key feature—or create awkward chair positions—revise the design before fabrication.
Think of the top and base as one object. Confirm support positions on the drawing and check them against the exact slab template rather than treating them as independent decisions.
23 — Match the table to the room, not just the slab.
A highly expressive top can be compelling, but it may compete with a patterned floor, ornate chandelier, feature wall and bold rug. The room needs a visual hierarchy. If the floor is busy, a quieter table can provide rest; if the floor and walls are restrained, the table can carry more of the visual statement.
Compare the stone in context with the furniture, architecture and lighting. The aim is not to make every element equally prominent, but to decide which one should lead and let the others support it.
24 — Review the marble beside the wood and chairs.
A tabletop is seen alongside chairs, flooring, lighting and cabinetry. Compare real samples together because warm and cool undertones can shift under different light. These pairings are useful starting points, not fixed rules:
| Marble direction | Pairing to explore |
|---|---|
| Botticino | Walnut and cream upholstery |
| Statuario / Satvario | Walnut or black details with restrained fabric |
| Venatino | Light oak and soft grey |
| Vietnam White | Warm oak and beige |
| Brescia Aurora | Dark walnut and ivory |
Place the wood, fabric and metal samples beside the full slab and view them in daylight and evening light before confirming a palette.
25 — Test the tabletop under its planned lighting.
Dining tables often sit directly beneath pendant lights. A concentrated beam can create a bright reflection on polished stone, strengthen the appearance of veins, shift perceived colour and cause glare from seated positions. Check the stone from the usual viewpoints and consider the pendant’s size, height, beam and dimming plan.
A slab that looks balanced under broad warehouse lighting may read differently beneath a focused fixture. Where possible, review a representative polished or honed finish under lighting close to the final specification.
26 — Match the scale of the veins to the object.
Pattern scale and furniture scale should feel related. A large dramatic vein can overwhelm a small side table; a very fine pattern may lose impact across a long boardroom top. Use the following as a starting point, then judge the actual slab and finished outline:
| Object | Pattern direction to consider |
|---|---|
| Side table | Fine movement or one selected focal detail |
| Coffee table | Fine to medium movement |
| Six-seat dining table | Medium movement, composed within the outline |
| Eight- to ten-seat dining table | Medium to expressive movement may have room to breathe |
| Large boardroom table | A stronger overall composition may be possible |
| Kitchen island | Depends on its openings and surrounding design |
27 — Plan cutting yield and the remaining material.
Before committing to a prized section, consider what remains after the main cut. Depending on dimensions and slab quality, a coordinated cutting plan may also produce a console, side tables, vanity top or other small surfaces. Using compatible areas from the same slab or lot can create a related material story across a home and improve material utilisation.
Plan secondary pieces before the first cut, not after. The fabricator should confirm that the proposed nesting respects the stone’s usable area, edge condition, vein direction and required allowances; yield should never override structural or visual suitability.
28 — Avoid these common selection and fabrication mistakes.
- Choosing from a small sample instead of reviewing the full slab.
- Selecting marble before the final dimensions and shape are confirmed.
- Assuming the strongest vein must be centred.
- Ignoring sink or hob cut-outs until after slab selection.
- Deciding the edge profile after fabrication has started.
- Specifying a one-piece island without checking handling and site access.
- Designing the tabletop and base independently.
- Cutting without physically marking or digitally overlaying the template.
- Overlooking how marble responds to acids, spills and everyday wear.
Most avoidable errors come from separating decisions that depend on one another: slab, template, cut-outs, edges, support, room context and installation.
29 — Tape it before you cut it.
For an important dining table or island, physically mark the finished outline on the slab or overlay the approved template digitally. Stand close to inspect the finish and natural features; step back about three metres to judge the full composition; take a straight-on photograph; and rotate the template to compare alternatives. Approve the exact cut only after the dimensions, edge, openings and supports have been reviewed together.
30 — What makes a marble table look expensive?
Usually it is not the marble price alone. A refined result comes from the combination of:
| Design decision | What to look for |
|---|---|
| Composition | Veins sit naturally inside the finished shape |
| Proportion | The furniture scale and marble pattern feel compatible |
| Edge detail | The profile suits the design and is executed cleanly |
| Base | Support feels visually and structurally integrated |
| Restraint | Surrounding materials allow the stone to breathe |
| Fabrication | Edges, cut-outs and joints are carefully coordinated |
A moderately priced slab, composed and fabricated thoughtfully, can look more sophisticated than a rare slab cut without a plan.
Fratelli Singh approach: bring the project drawing and finished dimensions to full-slab selection. Review the template and vein position, coordinate cut-outs and edges, confirm support and access, then approve the cut. The goal is not simply to find an attractive slab, but the right area of the right slab for the exact finished object.
Clear answers
Frequently asked questions.
Which marble is best for a dining table?
There is no single best marble. The right choice depends on the room style, desired vein intensity, table dimensions, slab condition and how the final template fits within the slab.
Is Statuario good for dining tables?
Yes. Statuario / Satvario can create a strong statement table when its grey veining is deliberately positioned within the finished top.
Is Botticino good for a dining table?
Yes. Botticino works particularly well when a warmer, more understated table is desired.
Can marble be used for a kitchen island?
Yes, but natural marble requires realistic expectations around maintenance, acidic substances, staining risks and surface wear.
Does sealing make a marble kitchen island stain-proof?
No. An appropriate sealer can help reduce certain absorption risks, but it does not make marble stain-proof or prevent acid etching.
Should a marble dining table be one piece?
A one-piece top can create excellent visual continuity when slab dimensions, support and handling permit it. Larger pieces are not always practical, so assess the project individually.
How do I choose which part of a slab becomes the table?
Position the final table template over the full slab and move or rotate it until the vein placement and background balance suit the finished design.
Should the strongest vein be in the middle?
Not necessarily. A slightly off-centre vein can sometimes create a more natural and sophisticated composition.
Which way should veins run on a marble dining table?
There is no mandatory direction. Movement along the table may visually lengthen it, while diagonal or cross movement can create a stronger statement.
Can marble tables be made with a thick-looking edge?
Yes. Depending on fabrication and structural design, edge detailing can create a visually substantial profile without requiring an unusually thick solid slab.
Is polished or honed marble better for tables?
Both can work. Polished marble has stronger reflection and colour depth, while a lower-gloss finish creates a softer appearance. Consider maintenance expectations too.
Is marble suitable for everyday dining?
It can be, provided the owner understands that marble is a natural material sensitive to acids, staining and wear and follows appropriate care practices.
Should I choose the table base before selecting the marble?
Design the base and top together because support positions, spans, visual proportions and seating clearance influence the final result.
Can leftover slab material be used for other furniture?
Often yes, depending on dimensions and quality. Planning consoles, side tables or smaller surfaces together can improve use of the original slab.
Planning a marble table or island?
Bring the finished dimensions, template, base design and site access details to a full-slab review. The cut, edge and support plan should work together.
Request assistance ↗